COSC 109 “Computers and Creativity”: Lab Assignment 04 Flash
tutorial handouts based on the instruction sets from website: http://bestwebdesignz.com/tips/flash-cs4-tutorial/flash-cs4-tutorial/
Flash CS4 Tutorials (Works fine w/ Flash versions 5,
6),
and Professional and Adobe Animate CC
Note: to access Flash on any of the COSC Lab
PC, use . . .
Start / All Programs / Adobe
Animate CC
02: Introduction to flash CS4
authoring environment
Let’s start by
clicking on the Middle column which says Create New – Flash File
(ActionScript.3.0)

You will find the flash
environment very similar to a paint brush environment, so if you are familiar
with paint brush, you will very much feel at home, now on the extreme right you
will find the various tool bars like Drawing tools,
view tools, color tools, options tools like the picture below.
![]()
On the top you will find a
menu horizontal bar, which is very similar to any menu in any other program, as
seen below.
![]()
As seen in the picture
below, at the bottom of the stage you will find the time line, you will see a
bunch of rectangles starting from 0 to 570, on the left of the timeline bar you
will find layers, on top of the layers1, there is something called timeline
button, if you click on the timeline button you can hide the timeline, in case
you want more space or room to work on with your drawings, etc, on top of the
page, below the main menu you will find an edit bar, where all your scene will
be on display, this edit bar shows where you are in the flash file.

Besides the edit bar you
will find on the top right you have symbols for editing the scenes on the stage,
and also for zooming in and out of the stage.
On the extreme right of the
flash page, you will see some panels namely Properties, Color, Align & Info
& Transform, Action, Library etc, as you can see in the picture below, you
can click on the panels to make necessary changes. You can customize your panel
settings by simply clicking on the windows option in the main menu, the panel
will come on stage, you can drag and drop in to the
right extreme like this picture shown below.

You will understand all the
above menus better as you work on it, this is just an
introduction to the flash CS4 Environment.
03: Panels and Panel workspace in
flash CS4
By default flash CS4 has a
few panels to work with, but you may need much more panels to work with, you
can customize your panels by just clicking on the window menu in the horizontal
main menu bar as seen in the picture below.

A list of panels are displayed
under the window menu, you can simply click on each one of them to have it on
your screen, sometimes it may just appear on the middle of the stage, you can
simply click on the header and drag it to the right and place it in any order
of your choice.
At the bottom the 3rd one
from the last you will find a workspace layout panel, you will find something
like a save current, by clicking on it you can actually save the panel setting
for that particular layout by simply naming it to layout1, etc, the next time
you open the flash, you may actually have one or two panels on the right which
is set as default, so instead of setting it all up again, you can go to windows
menu, and click on the layout1, etc to get back all the panels you chose to
work on.
04: Drawing in flash CS4
Let’s learn how to
draw in flash CS4, let start by drawing a rectangle and an oval, the reason why
we are starting with drawing a rectangle and a oval is because both these have
a stroke and a fill. Understanding strokes and fills are important to draw in
flash CS4 because they are treated as separate objects and not treated as one
object.
Using the oval tool on the
right hand tool bar menu like this one ![]() draw an oval on the
stage, if you notice to the right bottom of this oval tool is a small triangle,
when clicked on it, you will be able to select a rectangle tool, oval tool, Polystar tool etc.,
draw an oval on the
stage, if you notice to the right bottom of this oval tool is a small triangle,
when clicked on it, you will be able to select a rectangle tool, oval tool, Polystar tool etc.,
As you click on the oval
tool, just take a look at what happens to the options panel and the properties
panel on the right of the screen.

While you see the Stroke,
you can either type a number in the white box, or you can simply drag the
stroke button to and forth to get the size of your stroke, then you see the
style, here you can select the kind of stroke weather you want a solid, dashed,
dotted kind of stroke, then below is the scale, if you want normal, horizontal,
vertical or none.
![]() This is the stroke
options
This is the stroke
options
![]() This is
the color options. You can use the
stroke option and configure the settings or simply click on the fill color and
configure the settings.
This is
the color options. You can use the
stroke option and configure the settings or simply click on the fill color and
configure the settings.
On the main menu we have a
button which looks like a magnet like this ![]() you can use this
button to simply snap the objects in place.
you can use this
button to simply snap the objects in place.
Let’s draw an oval on the
stage, with the oval tool selected.
Let’s say we want to give it a red fill, easy enough we simply go
to this fill color and select red here. ![]()
And let’s say we want
a blue stroke,
![]()
If you really want the stroke to stand out, let’s make it thicker
than it is, by simply dragging the arrow to its right or by type in a figure in
the box.
![]()
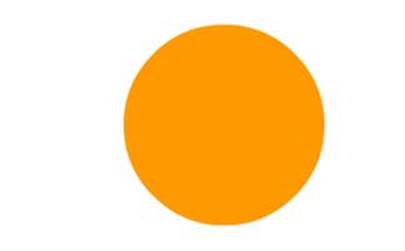
Let’s draw an oval on
to the stage, so click on the oval button and go to stage and draw an oval, as
you drop and drag, you will notice that as you drag it to a circle, it
will snap into place, now release
the mouse button, you will find a perfect circle with the colors you chose.

You will see a blue bind box
along the circle, this means that the circle has been
selected on stage. You can make changes to this object, while it is selected,
by simply choosing he fill color and the stroke color. If you don’t want
the circle to be selected on stage, simply press escape button on your
keyboard, it will deselect the circle on stage.
By default the snap object
button is turned on, while selecting an oval tool, now you can draw a perfect
circle by turning off the snap button by simply clicking on it, the background
will disappear on it. ![]()
Now draw the circle by dragging
the cursor on the screen and dragging it down by simply holding on to the shift
key on the keyboard,
You can select all objects
on the stage by clicking on each, or by simply hitting ctrl+A key in your keyboard and delete it by hitting
backspace.
Now if you want to draw a
circle exactly in the centre of the stage, you can draw by simply pressing the
alt button on the keyboard and dragging it, it will uniformly expand in all
directions.
Now let’s make a
rectangle on stage, you can click on the right bottom of the oval tool and you
will find a rectangle, click on it and draw a rectangle on stage. ![]()
The rectangle tool works
very similarly like a circle or oval tool, you can also use the snap objects to
draw a rectangle, with snap objects on, you can release the mouse button when a
circle appears at the corner of the square, and it becomes a perfect
square.

There is another panel
called rectangle options on the right panel space, if you want rounded edges to
your square you can use this rectangle options and type a number in the cells
provided to get the corner rounded edges. Like illustrated below:

You will find something like
this 
Sometimes you will not know
what exactly should be the rounded edges on the rectangle or square, there is
another way to do this, you can simply click on the rectangle tool bar and draw
a rectangle on stage, and do not release you mouse, you can now simply use the
up and down arrows to know how much of rounded edges you want to have in the
rectangle, this will give you an indication what you square or rectangle will
look like with rounded edges straight away.
05: Use of polystar
tool in flash CS4
We
will learn how to use a polystar tool in flash CS4,
this tool is somewhat similar to a circle or a rectangle tool that you are
creating basic shapes with it, but it has a few options that we need to
highlight for you, with a polystar tool you can
create two things, you can create polygons, a triangle, hexagon, octagon etc,
or you can draw a star shape with it.
![]()
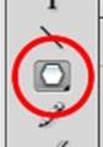
The
polystar tool is hidden under the small arrow in the right
bottom of your rectangle tool, you can simply click on the arrow and drag the cursor
to the polystar tool. You will notice to the
properties panel that the stroke and fill color are already there, apart from
that you will find an options panel to work with. 
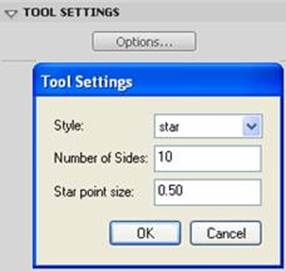
When
you click on options button a pop up will appear on the screen, like the pic
below. 
As
you select the style you can either choose from a polygon or a star style,
Let’s say you choose a polystar, then you can
select the number of sides, if you choose 3, you will land up drawing a
triangle, if you choose 4, you will land up drawing a rectangle or square, if
you choose 5 you will get a polygon, likewise you can choose 6, 7, 8,9,10, etc.
Assuming
you have selected a polygon and selected 5 sides to it, let’s just draw a
polygon on stage. 
You
can move it around by holding on to shift button and dragging the cursor
around.
Now
let’s draw a star on stage, click on the style and select star from the
tool settings as shown in pic3. and select star,
let’s say you want a 5 side star like how the kids usually draw, keep the
point size to 0.50 and draw one, again you can position your star by holding on
to shift button on your keyboard and releasing the mouse when you are convinced
about the positioning.

Let’s
now make the point size to 0.10 instead of 0.50 and see how the star looks

It
has a much different effect, just by changing the point size. Likewise try making
the point size to 0.90 instead of 0.10 and see what happens.

You
will see the centre much bigger, the easier way to remember is, the bigger
number of point size is the fatter the star. Another point to remember is your
point size will not get bigger than 0.99, so if you try 5,15 or even 25 point
size it will much look like the point 0.90 point size star.

Let’s
again create another star by clicking on the number of sides as shown in the
options panel in pic3. say make it 9 points and keep
the point size to its default 0.50 and see how it looks.

So
a polystar tool will be of much help apart from an
oval or a rectangle tool,
![]() 06: Object drawing Mode in Flash CS4
06: Object drawing Mode in Flash CS4
Let’s draw a circle on stage and
similarly with another color chosen from the color panel box draw another
circle on stage, you will find flash CS4 different from Flash Professional, in
the sense both the circles are on drawing object mode and you can change the
color of each the way you want, unlike flash professional, the second object
drawn on stage will be considered as a grouped object and you cannot change the
color, if you want to change the color you can by clicking on the grouped
object, but in Flash CS4 you can change the color, use a stroke, change the
color of stroke etc.,

Let’s draw
one circle first and draw the second one overlapping on the first circle. 
and then moving it
away from the first one, see what happens. 
You can avoid this
by selecting on each circle and clicking on the group option under the modify
menu on the main menu here.

Once you group each
object, you can separate them even if there are overlapped on each other by not
cutting them.
![]()
You can use the
object drawing mode switched on which is found on the options panel on the main
menu on the extreme right bar and draw,
then flash CS4 will treat circle a separate drawing.
07: How the Line tool, Pencil tool,
brush tool and pen tool work in in Flash CS4
It is very important
to understand how the various drawing tools work in flash CS4, let me just take
you through on some of these, on the extreme right on the menu, you will find
the various drawing tools
The line tool looks
like this, ![]()
when you click on
the line tool and draw on stage you can go any direction, but if you want to
draw a square Let’s say, you can draw a straight line downwards, you will
see that by default the snap tool is selected and the line will snap in place,
when it is perfectly straight, like wise to the right, up and left you will
join the first point, you can draw a 45 degree line, and it will snap in place.
This is a very important drawing tool in flash CS4.
The same way you
can draw with pencil tool, when clicked on the pencil tool which looks like
this. ![]()
You will see that
the property setting are just a stroke color, you can draw a zig zag on stage
and notice that you can only select a color which is of stroke, and may not
give you the option of the fill color.
In the option menu
box you have two options like this ![]()
The top one is a
smooth curve and the bottom one is a straight line, assuming you have drawn a
zig zag on stage with a color red, selecting the drawing on stage, as you click
on the smooth button the shape of the zig zag will smoothen, and the other
straight button works differently than the smooth button, when selected the
drawing, and clicked on the straight line, it will straighten the line to a
virtual straight line running downwards.
The next tool is
the brush tool, which looks like this ![]()
As you click on the
brush tool, you will find that in your properties panel, you have only a fill color
and not a stroke, this tool works very much like the pencil tool, with the
smooth option tool and the straight option tool working with the brush tool
very similarly like the way it works with pencil tool.
Another important
tool is the pen tool, this tool looks like this ![]()
As you take the pen
tool to the stage you will find that it make a dot with a florescent green, and
once you release your mouse and make the second mark on stage, you will find a
second point, and the first and second connect, this will happen till you
finish all your drawings on stage and touch the start point, when pressed
escape you will find the shape you drew, and accordingly fill the color of your
choice, this pen tool will draw straight lines, if you want curved strokes, you
can simply drag the mouse with the cursor moving either ways and then
connecting the points to the starting point.
08: How to use Ink bottle and paint
bucket tool in flash CS4
On the extreme right of the
screen in flash CS4, in the main menu you will notice the paint bucket tool,
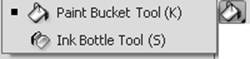
at the right bottom of this
tool, you will see a triangle, when you click on this triangle you will get the
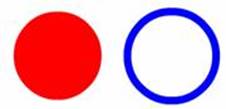
ink bottle tool, Now Let’s just draw a circle with no stroke on the
stage, so select a color, Let’s say red, and turn the stroke off and draw
a circle on stage, now draw another circle with no fill and only a stroke color
selected, say blue on stage, Let’s say you have something like this on
stage,
You can click on the ink
bottle tool as shown in figure 1, select a color, Let’s say black and click
on the red circle drawn, you will get a black stroke on the red circle drawn,
similarly click on the paint bucket tool, select a red green fill and click on
the blue circle drawn, you will find the blue circle with green fill in it,
like you see below.
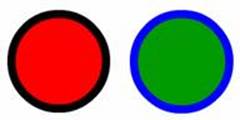
This is the difference
between paint bucket tool and ink bottle tool.
09: How to manage layers in Flash CS4
All
this while we were working on flash CS4 on stage on a single layer, now
Let’s just draw a simple website design by creating a rectangle green
color menu bar in layer1, by double clicking on the layer1, you will be able to
change the name of the layer, say call it menu,
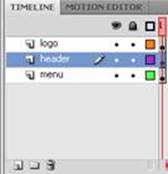
On
the left bottom of this picture above, you will find an add layer button, you
will be able to create layers by simply clicking on it, if you notice very closely that there is
a dark grey box in the time line of the layer header, that means we have put in
an object on stage, similarly create another layer and make another rectangle
yellow box on top of the page, similarly create another layer and write your
company name on it, you can double click on each layer and name them
differently, you will notice that you have three grey boxes with a black dot in
each layer on the time line 1. This is to make sure that each layer does not
interfere with each other.
You
can make each of these layers invisible by simply clicking on the eye button in
the respective layer ![]()
in case you want
to edit the bottom layer and you are unable to do it, you can also click on the
lock button ![]()
to make sure, that
you don’t move it around.
So
get used to using the pad lock icons by simply clicking to make it invisible
and lock them and by clicking on it, to make it visible and unlock them.
So
you know how to manage layers in flash Cs4, I would recommend that you always
label your layers, suppose you draw a whole lot of drawings on stage, and later
if you want to edit it, you may not know what each layer contains, again you
can delete any layer any time by simply click on the layers, selecting it, and
clicking on the trashcan found on the right bottom of pic1, it will look like
this ![]()
Notice
one more important thing while working in flash, if at any point you think you
want to undo, you can simply click ctrl+z on your
keyboard, and you can get it back.
There
is another button between creating layers and deleting layers in the pic1. These
are adding folders, by clicking on it, you can add a
folder and store all your files by dragging and dropping them into that folder,
and naming that folder header folder.
10: How to make an image big on rollover in flash CS4
First
of all you need to have the same image of two different sizes and save it in
your directory.
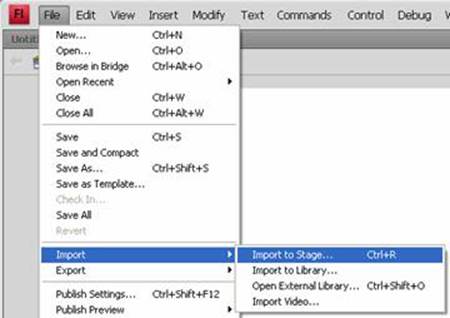
Open
flash CS4, and import an image on the centre stage, by going to the main menu
file-> Import -> Import to Stage, as shown below.
In
this case I have imported the smaller sized image to the stage. You can save your file,
in this case I have saved it as rollover and it will by-default be saved as a .fla file.

Now
click on the image and Press F8 to create a button, call it a name and press ok
You
will see a blue outlined with a small circle in the middle of the image as
shown below.

Double
click on the button, you will enter the button mode as
shown here. 
Your
button mode will have something like this shown below, your layer will be
called by-default Layer1, and you will have an up, over, down and hit area in
the button.
Click
on the over and right click your mouse and create a blank keyframe
like this shown below
Repeat
the same for the hit area also, now as you scrub the timeline over all the four
modes you will be able to see the orange tag moving with it.

Now
click on the hit area and draw a rectangle in the centre of stage as shown
below.

Now
click on the Over area and import the bigger image to the centre of stage as
shown below.


Now
test the movie by going to the control menu on the main menu and selecting the
test movie or you can also press Ctrl+Enter, a .swf file will be created, in this case rollover.swf will be
created and you will notice that the image becomes larger on rollover.
That’s
it, you now know how to make an image big on rollover
in flash CS4.
![]()
11: Creating Mask in Flash CS4
A
mask is simply to hide or reveal certain parts of a layer, for Let’s say
we import an image on stage, so go to File -> Import -> Import to stage
like the one here
You
have imported an image from your image file to stage, Let’s say you want
to reveal a small portion of this image, you want to hide most of the picture,
we need to create a mask to do that in Flash CS4, the way we need to do that is
by creating another layer above the picture layer, Let’s first lock the
picture layer and rename layer1 to picture and create another layer and name it
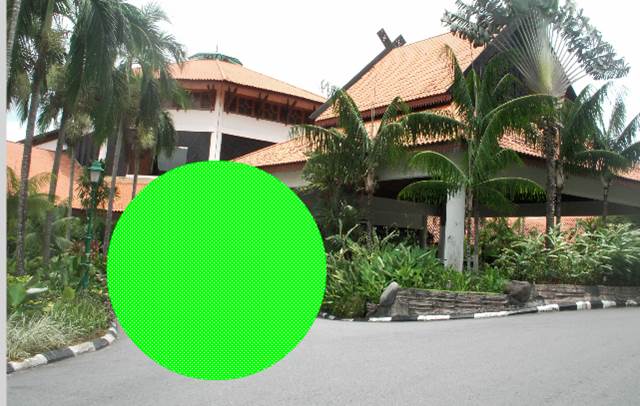
mask, Now Let’s draw a mask, select the mask layer and draw a circle on
stage by selecting a bright green color, it doesn’t matter what color you
select, so draw the circle on stage for the picture you actually want to see,
the mask is going to act as a flash light so whatever it touches is what we are
going to see, having drawn a circle for the picture you want to see, you will
see something like this
By
doing this we actually don’t see the picture what we really wanted to
see, the mask is not done yet, now click on the mask layer and right click on
your mouse and select mask,
As
soon as you do that you can see what we wanted to see like the picture below.

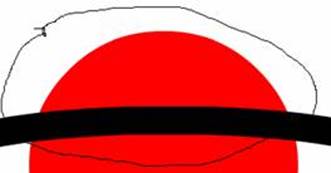
To
do more practical illustration, let’s draw a planet with a ring around
it, so first draw a red circle, select the oval tool and select the color red
and draw a circle on stage and call
it planet in layer1, lock layer planet and insert a layer just above layer
planet and call it rings, so by choosing a oval tool, we don’t need a
fill color but we need a stroke color to this ring, make the thickness of the
ring to 30 and draw a ring on stage, by selecting the oval shape and pressing
alt and dragging it around the red circle you will get something like this
below,

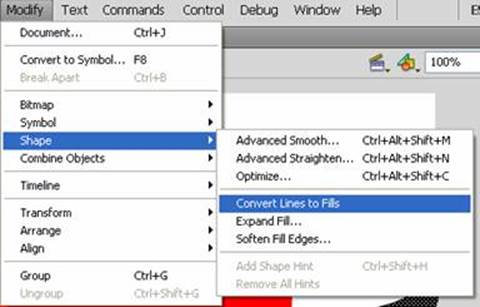
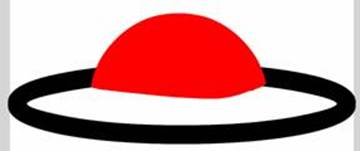
now make the ring
to a fill instead of a stroke, we can do so by first select the black ring in
the rings layer and by going to the main menu-> Modify->Shape->
convert Lines to fills.
We
need to create a mask and hike this section like this one here

Remember
that while creating a mask you need to create a mask that you want to reveal
and not the parts you want to hide, so we don’t want the mask to touch
the picture above but everything else other that
that, so Let’s create a new
layer and call it mask right above the rings layer, now copy the rings layer and paste it in
the mask layer by going to the rings layer, select the ring, press ctrl+c to copy it, lock the rings layer, go to the mask
layer and paste it exactly the same place as it was in the rings layer by
pressing Ctrl+Shift+V, it will paste the rings in
exactly the same position as it was in the rings layer, now be very careful and
follow the step very carefully, Let’s lock the mask layer for a second,
unlock the planet layer and using the lasso tool just copy the top part of the
planet that is touching the ring, we are actually trying to cut out the ring
that is supposed to go behind the planet,
We
have made that selection now copy it from the planet layer by pressing Ctrl+c then lock the planet layer, go to the mask layer and
unlock it and then paste it in the mask layer by pressing Shift+Ctrl+V,
Let’s make the planet layer and the rings layer invisible by clicking on
the eye icon on each layer to see what we have done in the mask layer.
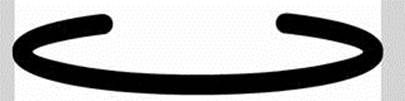
Now
that you have pasted the red cap which is interfering with the black ring you
can select the red cap and delete it by pressing delete button, then your mask
layer will look something like this below.
Now
there we go, we see only the portion of the ring we
need to see, now we can make all the layers namely, planet, rings and mask
layer visible, but still you will see picture
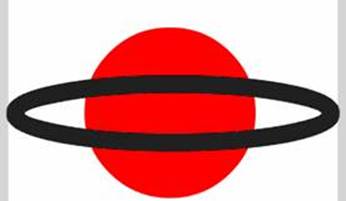
That’s
because we have not applied mask to the mask layer, now click on the mask
layer, right click the mouse and select mask that it you image will look
something like this.

12: Moving Ball Animation in Flash
CS4
In this tutorial you will
learn how to move a ball from left to right,
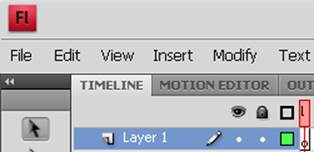
When you open flash CS4 you
will by default be placed in layer 1 and any drawing on stage will be drawn in
the first frame of your timeframe.
Now Let’s draw a ball
on stage, so click on the selection tool, click on the oval tool, then in the
properties panel, under the fill and stroke panel, switch off the stroke and
select any color, in this instance say orange, and draw a ball on the left of
the stage by pressing the shift key and dragging the mouse,
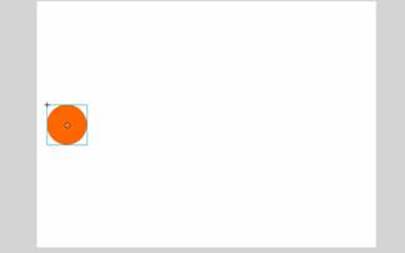
you will
notice that the first frame on the timeframe gets darkened, then let’s
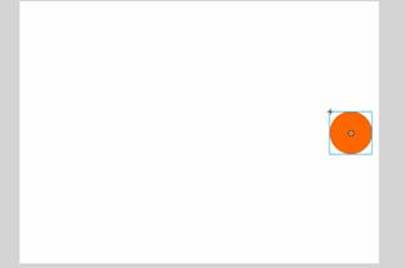
say we want to end the keyframe to end at Frame12, so
go to frame12 and press F6 to add a blank keyframe.
Now on the new keyframe (Frame12) drag the ball by
pressing the shift key so that it stays on the same line and drop it on the
right,
now we want
to create a classic tween in-between these two keyframes,
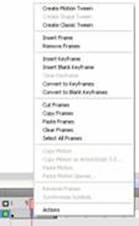
so click
anywhere between 1 and 12 keyframe, click the right
button on your mouse and select create classic tween, you will notice the keyframes from 1 to 12 changes color from a grey to a light
blue.
Now if you want to see how
your movie looks without scrubbing along the time line, you can simply do this
by pressing Ctrl+Enter.
You will see the orange ball
moving from left to right and will repeat this over and over again,
this is because flash by default has been looped to perform this function.
If you want to end up in the
exact same position as the starting position, go to frame 24, copy the ball in
the first keyframe by pressing Ctrl+C
and click on frame 24 and press F7 to insert a blank keyframe,
now make sure that
24th keyframe is selected and paste it
in the same position by pressing Ctrl+Shift+V, now
you can right click and select create classic tween.
If you test your movie by
pressing Ctrl+Enter you will see that the orange ball
is moving from left to right and back continuously.
13: How to create a shape tween in
Flash CS4
A shape tween in basically to morph
one shape to another, for example we can draw a oval shape
on stage and morph it to a star on stage. Now Let’s
draw a oval shape on stage, by selecting the oval tool, draw a oval shape on
stage by choosing a fill color and do not use a stroke color.
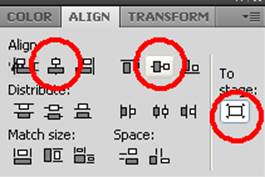
When you want to morph two different
shapes on stage, make sure that both the shapes are on the center of the stage,
you can do that by selecting the shape, click on the windows tool bar and click
on Align, you can select the horizontal and vertical align so that the shapes
are centered on stage, now go to frame 12 and press F7 to create a blank key
frame, now by selecting the polystar tool, select the
star with let’s say 8 points and draw a shape on the centre of stage, you
can repeat the align tool bar to make sure that the star drawn on stage on the
twelfth key frame is centered.
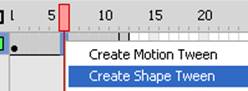
Now click in-between the two key
frames and select the shape tween, Now press Ctrl+enter
to test your movie, you will notice that the oval shape slowly starts
converting into a star shape.
Shape tween in flash is basically a
way to morph one shape into another shape, for example we will take an oval
tool and draw an oval shape on stage and morph it to the shape of a star.
We will start in frame 1 and grab
the oval tool  and draw a circle in
the center of the stage like this one below.
and draw a circle in
the center of the stage like this one below.
Make sure it is snapped right in
center of the stage, because if you want to morph it from one shape to another
shape, we do not want to be moving around much while we are doing that. So go
to your align panel (Ctrl+k) on the right and choose
the horizontal and vertical center tool and it will make sure that it is
aligned to the center of stage like this one below.
So, now that you have centered it to
the stage, so when you create the next shape you can do the same alignment so
that it centers to stage. So let us say that we want it to take one second ie:12 keyframes. So go to the 12th keyframe and hit F7 to add a blank keyframe
there. The reason you hit F7 is because you do not want the orange circle
anymore. Let us draw a star in frame12, so choose the polystar
tool
and to your right under the tool settings click on options and
change the tool settings there to star and make the number of sides to 10 and
leave the star point size to 0.50, now press OK.
Now draw a star on stage, and center
it on stage by using the align horizontal and vertical
alignment as discussed above, so that it will be in the same spot as the circle
is in on frame1.

So we have drawn our beginning and
ending keyframes, so we know how it is going to start
up and how it is going to end up, now we need to create a shape tween. So click
anywhere inbetween 1st and 12th keyframes
and right click on your mouse and select the Create Shape Tween.
Now scrub across your time line to
see how it works. You will notice that your circle morphing into a shape of a
star. And that is how you create a shape tween in flash cs4.
Let us do something a little more
difficult, like morphing one letter into another, so open a new document and
start fresh.
Let us morph letter “B”
to letter “W”.
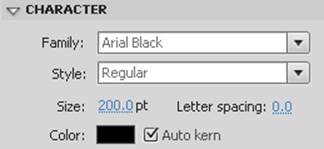
So select your font, I have chosen
font Ariel, Size =200 px and
color Black as shown below.
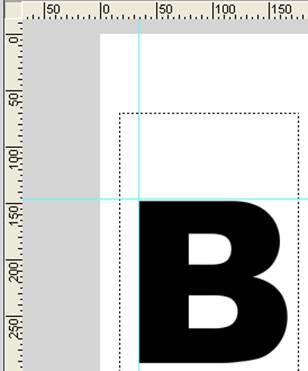
Choosing the text tool write letter
“B” on stage on frame1 like this one below.

Now break it down to a raw shape
using CTRL+B, now that you have a raw shape on stage, you can morph it either
on the center of stage or to any part of the stage, in this case let us morph
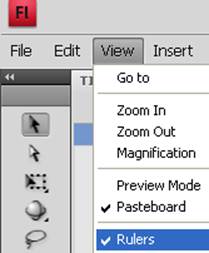
it, to the left of our screen, so let us pull down some rulers and mark the
exact place where we want it to morph, so go to View on the main menu, and
select rulers, click on the rulers and drag it to the stage, you will see a
fluorescent blue line you can make your own markings and you can have as many
ruler guides as you want on stage.
you will find a scale on the left and top of your stage, just
click on the scale and drag it down and right to get the lines on stage like
this one below.
Now go to frame 12, and click on F7
to create a blank keyframe, now chose the text tool
and write “W” using the same font, size and color. You will have
“W” on stage in frame12. now select any keyframe
between 1 and 12 and right click on your mouse and select the select the shape
tween, now as you scrub across the timeline you will see the shape of
“B” changing into “W” and you may not like the way you
are animating, you can actually morph it exactly the way, you intend to.
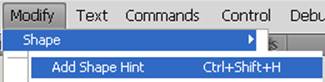
For that you have to bring in the
shape hint on to the letters, you can do so by clicking on the Modify menu on
the main menu, select shape and click on the Add Shape Hint, or the shortform is Ctrl+Shift+H
Go to frame1 and press Ctrl+Shift+H, you will find a red button, now click on it
and drag it to the top left of the letter “B”, now go to frame12
you will find the same red button, click on it and drag it to the top left of
the letter “W” , as you do this you will find that the red button in
frame12 turns green, that means Flash CS4 is recognizing the shape hint you
intend to do, you can have as many shape hints as you want, ideally you would
like the top left, top right, bottom left, bottom right and the center, to have
a smooth animation from “B” to “W” after you are
finished scrub the timeline and see the effect, it is very much the way you
intended to be.
That is it,
you now know how to do shape tween in Flash CS4.
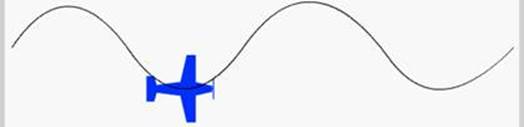
14: How to create a motion guide in Flash CS4
We have already learnt how to move a
ball from the left of the screen to the right, now Let’s learn how to
move an object from the left to right not necessarily in a straight line but in
a zig zag motion, let take
an object aeroplane on stage and we want it to go
from the left to right in a zig zag
or a smooth curve motion, we can do that by using a motion path or guide in
Flash CS4, we do that by drawing a stroke or curve on a different layer and
orient to path.
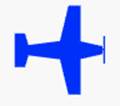
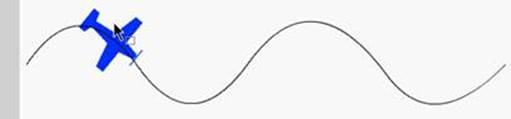
Let’s take an object for
example like this aeroplane on stage and save it as a
graphic symbol called plane, now call this layer1 aeroplane
layer, now you must create another layer called guide layer on top of the aeroplane layer.
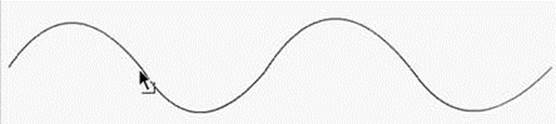
Let’s go an lock the aeroplane layer and also make it invisible by clicking on
the lock and eye icon on top of the layers, and work on the guide layer, in
this guide layer on frame1 draw a curve in the form of a snake shape, it
doesn’t matter what color you use, just draw a curve in a zig zag manner going from left to
right of the stage like the one below.
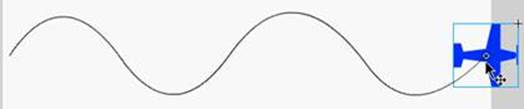
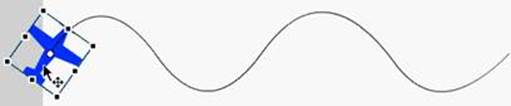
Now we need to attach this aeroplane to the guide layer, so unlock and make the aeroplane layer visible, and lock the guide layer above the
aeroplane layer by clicking on the lock icon. Now
with snap objects turned on, click on the little circle in the middle of the aeroplane and take it to the starting point of the guide,
it will automatically snap in place.
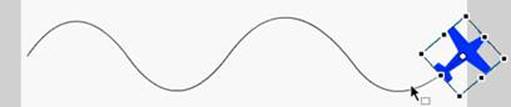
Let’s make a motion tween and
snap it to the right side of the guide, so let’s create a new keyframe by pressing F6 in frame 24, now when you look at
the stage from frame 24, we can’t see the guide layer, now where has the
guide layer gone, we need to insert keyframes in the
guide layer because only frame 1 has the guide lines showing, but frame 2 to
frame 24 does not have the guide lines showing, so go to frame 24 in the guide
layer and press F5, now you will see the guide layer visible in the entire
animation like the one below.

So in frame 24 in our aeroplane layer we need to get this aeroplane
on the right side, so go to frame 24 and place the aeroplane
to the right by clicking in the middle of the aeroplane
grab it and drag it till it snaps into place. So in frame 1 it is on the left
side of the guide and in frame 24 it is on the right side of the guide like the
one below.
Now make a motion tween by clicking
in the middle of both the layers and select the motion tween. Now check your
movie clip, you will notice that the aeroplane is
going from the left to the right along the guide like the one below.
If you test you movie, the best
thing about this guide layer is that it does not show up while running the movie
clip. While you run the movie clip, although you see the aeroplane
going along the path directed, but it is a little weird that it is wiggling
back and forth, and that’s not the way an aeroplane
flies.
Let’s use the free transform tool
and go to the first frame and rotate the aeroplane in
the way the guide is moving, also do this in the last keyframe
(keyframe 24) and position it in the way the
guidelines end like this one below.
When you test you movie clip, the
animation is still not working properly as you see below
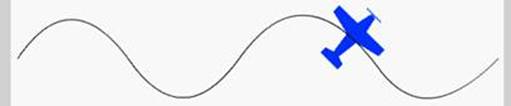
To get this properly click anywhere
between your first and 24th key frame and go to your properties panel and you
will notice that there is something called orient to path,
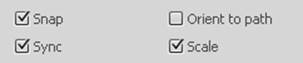
just check that option and test the movie clip.
If you find the animation too fast,
that is the aeroplane moving from left to right too
fast, you can insert some layers in-between the fist and twenty forth by
clicking and dragging both the layers and pressing F5, Let’s say we want
to take it up to frame 48, so insert frames in both the aeroplane
and the guide layer till it reaches frame 48, now test you movie clip, you will
notice that the aeroplane animates much slower and
also looks good.
That’s it! You have learned
how to make a motion guide in Flash CS4.
15: Learn how to create a bouncing ball in Flash CS4
Let’s draw a ball on top of the stage, we are
basically trying to bounce the ball on stage, so we need to know the ground
level or the bottom, you can use rulers by choosing from the view menu bar and
activating the rulers, now mark your bottom level where the ball should bounce
down.
So Let’s
jump up to frame 12 and press F6 to add a new key frame and holding on to shift
(so that it stays in the same line) drag the ball down to the markings.
Create a classic tween in between
frame 1 and frame 12, now try running the movie clip,
you will see the ball going up and down on your screen. Now we are going to
take the ball up, not as high as we started with, so go to frame 21, hit F6 and
pressing on to shift key drag the ball up, a little below from where you started
in frame 1.
Again to up to frame 29 press F6 and drag the
ball to the ground level, again go to frame 35 press F6 and drag the ball
slightly higher from ground level, then go to frame 39 and end the ball on the
ground level, now go between frames, right click and insert a classic tween.

When you test your movie clip you
have a bouncing ball.
16: Learn how to put multiple classic tween on stage at
the same time in Flash CS4
Let’s
say we want to animate two balls one in blue to go from left to right and the
red one to animate from right to left as shown below.
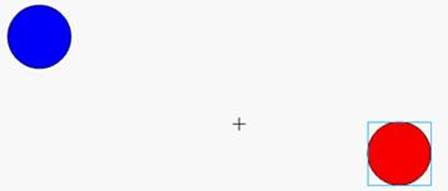
Let’s draw one blue ball in Frame1 one in blue starting from the
left in layer 1 and make another layer2 and draw a red ball starting from the
right like the one shown above. Now move to frame 20, hit F6 and in layer 1
using the shift key drag the blue ball and drag it to the right and in layer 2
using shift drag the red ball to the left.
We
are trying to animate the blue to the right and the red to the left. Now
select both the layers and create a classic tween and test your movie, you will
notice that the two balls and moving on either directions.
This
is really helpful when you are creating a text using multiple classic tween.
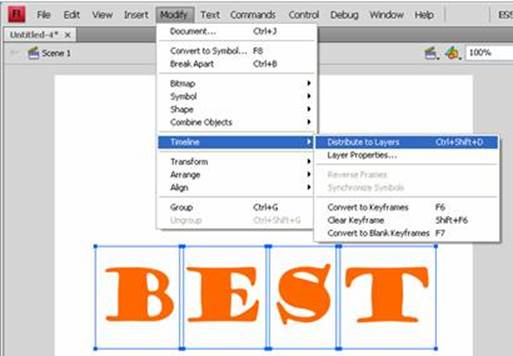
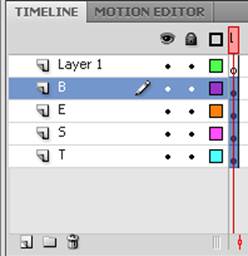
Let’s
say we want the letters BEST to
drop on stage one at a time, so using the text tool type best on stage, since
we want each letter to fall separately by itself we need to break each letter
separately, we can do so by selecting all the letters and pressing Ctrl+B, having done this we need to take the
‘B’ separately the ‘E’ separately and so on to
different layers, we can do so by selecting the entire text, and go to modify
menu, timeline and distribute to layers. In your time line you will see that
BEST each letter is distributed to separate layers as shown below.
You
will notice in the above picture that the layer1 is also appearing, we may not
need this layer, and you can delete this by selecting layer1 clicking on the
trashcan below. Now let’s go up to to frame 40,
hit F6 to add a new keyframe, Let’s take frame
40 to be the ending keyframe where you want all the
letters BEST to end up. Now let’s go letter by letter, first layer T
click on the first keyframe and nudge the letter
‘T’ upwards like the one below, like wise do it for ‘S’
“E” and ‘B’ .

After you have done this click
between frame 1 and frame 40 selecting all the layers and create a classic tween,
and test you movie clip by pressing Ctrl+Enter.